CAMERA INDUSTRY FACTS

Die Geschichte der Fotografi!
4. Jhdt. v. Chr. Aristoteles beschreibt die Camera Obscura.
1826 Joseph Nicéphore Niépce nimmt das erste beständige Bild auf.
1839 Daguerre und Niépce präsentieren die DaguerreotypieCa..
1841 William Henry Fox Talbot entwickelt das Positiv-Negativ-Verfahren.
1889 George Eastman präsentiert den Stripping-Rollfilm (Kodak).
1925 Leica bringt die erste Kleinbildkamera mit einem 35mm Film heraus.
1936 Erfindung des Farbfilms (Kodak: Kodachrome, Agfa: Agfacolor).
1948 Die erste Polaroid-Kamera liefert ein Sofortbild.
1950 Die Photokina wird ins Leben gerufen.
1956 Die erste Kamera mit Zeitautomatik kommt auf den Markt.
1963 Die erste Kamera mit automatischer Schärfeeinstellung.
1974 Rollei produziert die erste vollelektronische Kamera.
Ende des 20. Jahrhunderts Übergang von analoger zu digitaler Fotografie.
How to develop photos on stone in a darkroom. WRITTEN BY TOMAS BATES
I have always loved the idea of seeing my photos on stone and other natural materials. So, a few months ago, I began googling how it could be done. This is how I discovered (and fell in love with) liquid emulsion. Liquid emulsion is photographic emulsion which you can melt down and paint on any surface. You can then expose an image and develop it using traditional darkroom chemicals. In this article, I would like to explain the process a little, so that if you are also interested in giving this fun process a go, you can!
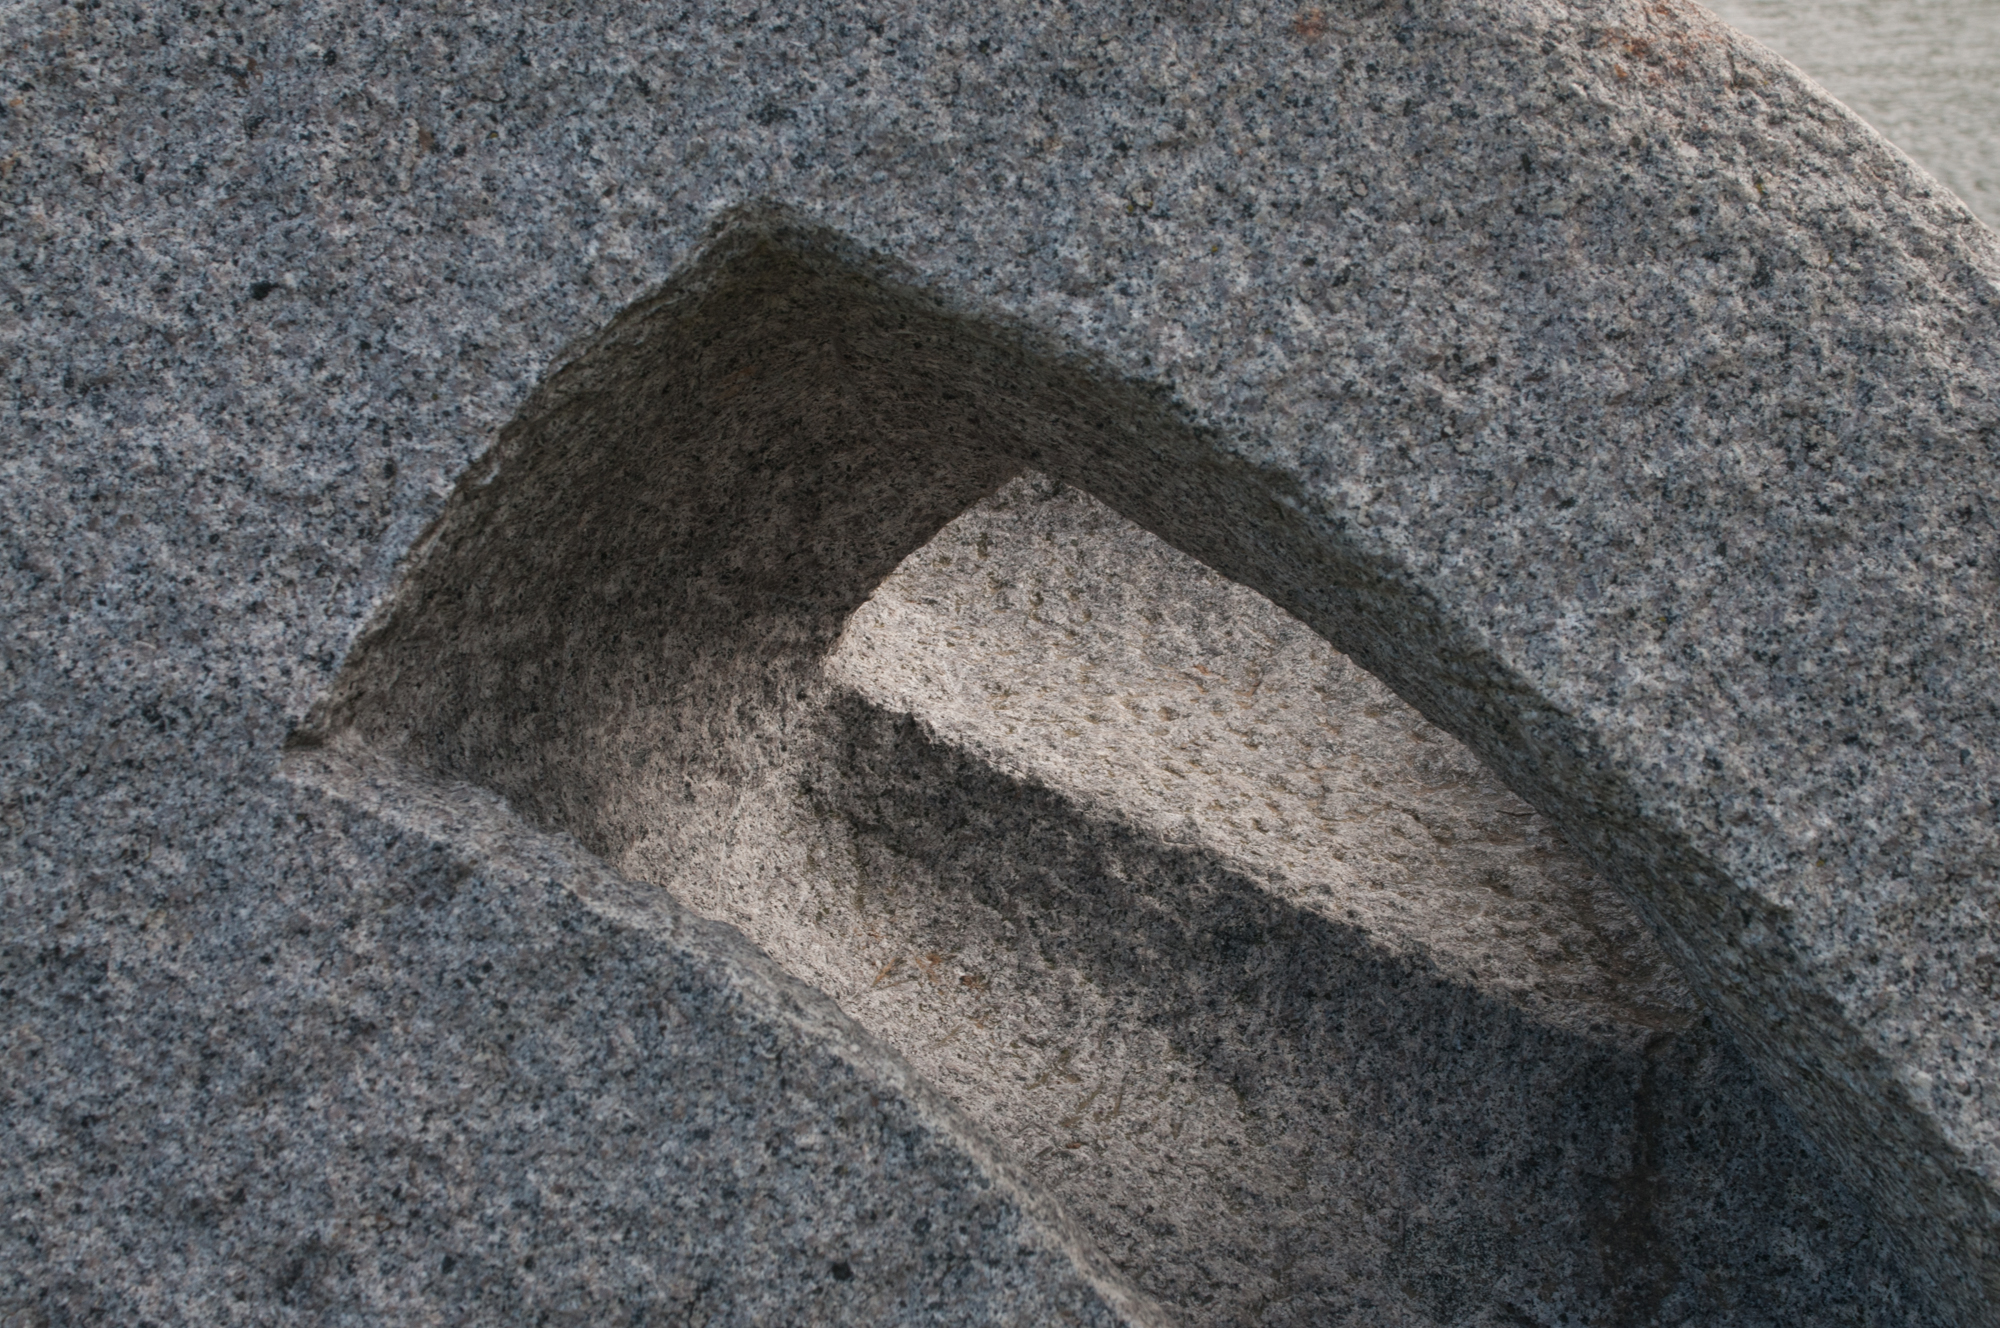
Step 1 – Picking Your Stone
From my experiments wth liquid emulsion on stone so far, I have found that some surfaces work better than others. Stones which have lots of cracks and holes in them aren’t ideal, because unless you get lucky, they will disrupt your printed image. Your photographic chemicals will also soak into cracks and holes in the stone which makes it harder to properly fix and wash – this can lead to your image discolouring over time. Stones which are very smooth are also quite tricky to develop photos on. Even though you apply a layer of gelatin to the stone to help glue the image to the surface of the stone (see the next step for more detail on that), this often hasn’t been enough and I have had a few photographic failures where my image floats off into oblivion when soaking in one of the chemicals. So, I have found the best stones to work with to be ones which have a bit of roughness to them but not too many cracks.

Step 2 – Applying The Photographic Gelatin
Equipment Needed:
- Photographic Gelatin (until now I have been using Rollei Black Magic Gelatin)
- Distilled Water
- Cooker/Stove
- Saucepan
- Stirrer
- Paintbrush
The reason for carrying out this step is to help your photo stick to the stone surface. First, take the amount of gelatin crystals you need and put them into a small saucepan (which should then only be used for this purpose in future) and add some distilled water. Then heat the mixture on a stove and stir constantly until all the crystals have melted into the water. Take a paintbrush and paint the melted gelatin mixture onto the stone until you have a good covering – One good coat should be enough. You then leave the stone to dry (I usually leave it 24 hours). Your stone should now have some ‘bite’ which makes it easier for the photographic emulsion to adhere properly.
Step 3 – Switch Off The Lights! Applying the Liquid Emulsion
Equipment Needed:
- Liquid Emulsion (until now I have been using the Foma brand emulsion)
- Gloves
- Very Hot Water
- Saucepan
- Glass Jar
- Plastic Spoon
- Plastic Stirrer
- Paintbrush
- Watercolour Paper
- Hairdryer
- Light Proof Box
Up until this step, you are fine to work with your regular lights on. But starting now, you need to turn them off and turn the red light in your darkroom on! Because liquid emulsion is light sensitive and the emulsion (and your photo) will be ruined if exposed to regular light.
Before opening your emulsion, heat up some water in a kettle and pour it into a saucepan. Then put a jar in the water so that the jar is surrounded by the hot water. The reason you do these things is because you need to melt the emulsion before you can paint it onto the stone (at room temperature, the emulsion is like a hard jelly).
Now carefully open the emulsion container (wearing gloves because you are dealing with chemicals) and use a plastic spoon to take out a small amount. Put this liquid emulsion into the jar surrounded by water; if you use Foma emulsion like me, you should also add a few drops of the hardener solution which comes with the emulsion into the jar at this stage. Then take the stirrer (by the way, make sure to use a plastic one because metal objects can damage the emulsion) and stir the emulsion/hardener in the jar until it is completely liquid.
Next, paint the emulsion onto the stone using a paintbrush. I usually do a quick first coat and then use a hairdryer to dry it a bit (another side note, use a hairdryer with a cool mode as hot air can also damage your photo). I then paint on a second layer of emulsion to ensure full coverage of the stone. Once the stone is ready, take a few strips of paper (preferably thicker watercolour paper) and paint these with any emulsion you have left; these papers will act as your test strips in order for you to calculate how long you need to expose your image for. Once your stone and test papers are painted with emulsion, move them into a light-proof container. I use a big black plastic storage box for this purpose. Leave your stone for 24-48 hours until the emulsion is completely dry.


Step 4 – Switch Off The Lights (Again) – It’s Developing Time!
Equipment Needed:
- Tongs
- Gloves
- Paintbrushes
- Photographic Developer
- Photographic Fixer
- Developing Trays
- Water
- Photographic Enlarger
- Kitchen Towel
- Hairdryer
- Drying Rack
Now we get to the fun part! This is where all your preparations (hopefully) pay off and you get to see your photographic image materialise on stone. I will not go into too much detail in this section about the basics of how to develop photos in a darkroom, since this topic is covered in fantastic detail elsewhere on the internet. Also, the steps you should follow here are very dependant on which liquid emulsion you use and which photographic chemicals you use (so these instructions below are the ones I follow because I use Foma-brand liquid emulsion – but different manufacturers have different instructions they advise). So, the basic steps I follow are:
- Make test prints of your image using the strips of paper you painted with liquid emulsion, in order to determine your exposure time.
- Once you have established your exposure time, expose your stone for that amount of time.
- Develop your image in photographic developer – I use a paintbrush to paint developer over the stone; I do this in order to try and make sure the chemicals soak over the stone and emulsion completely – It also makes me feel a little artistic!
- Put the stone in water for a few seconds.
- Place the stone in the photographic fixer tray. It’s important to fix your image properly; I have had quite a few times where I didn’t do it correctly and then my photo discoloured because the emulsion wasn’t fixed as it should have been.
- Once you are confident your photo is properly fixed, you can switch on your regular room lights again.
- Wash the stone for 20+ minutes (preferably in running water or with several changes of the water to help ensure all the photographic chemicals are washed out from the stone).
- Take the stone and pad it down with some kitchen towel to try and take off excess water. Be careful because the emulsion is still very delicate at this stage.
- Use a hairdryer to dry the stone a little more and place it somewhere (such as a drying rack) to dry off for at least 24 hours.
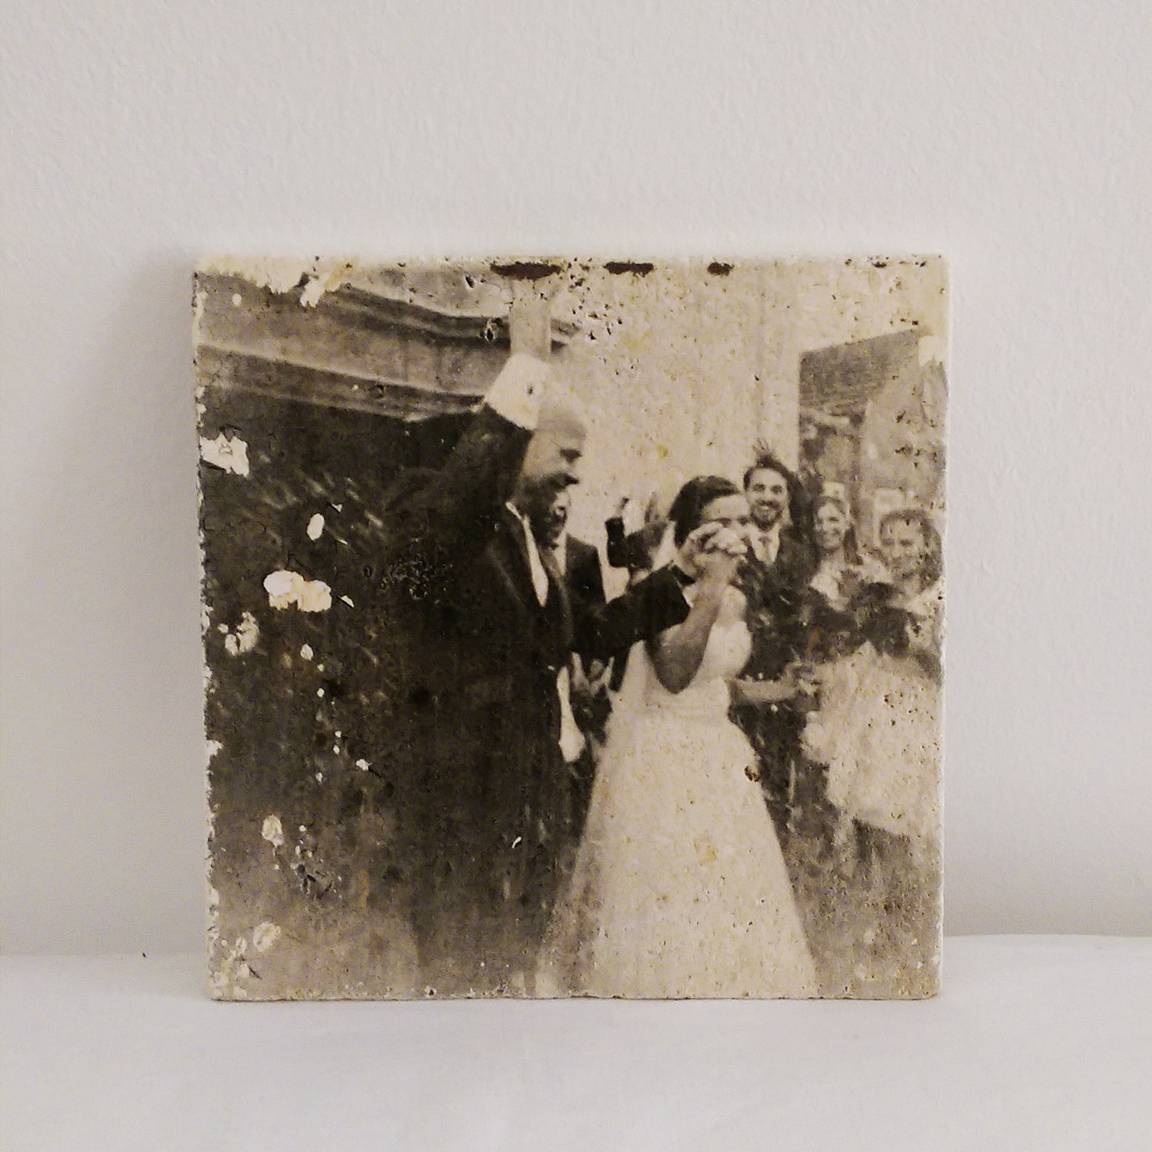
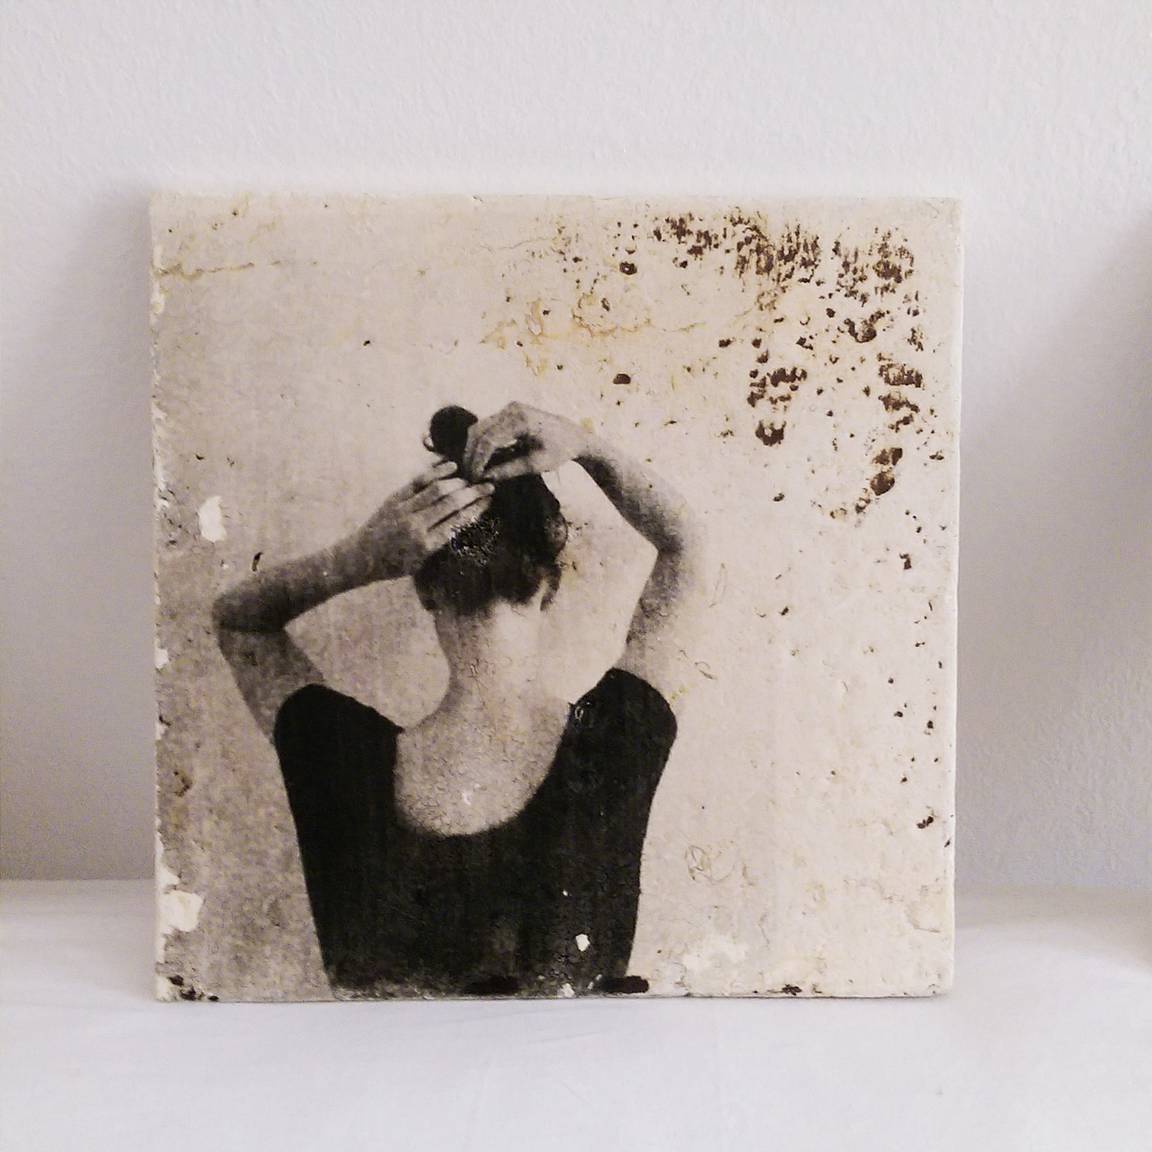
Hallelujah, hopefully after this you have your very own photographic print on stone!
WRITTEN BY TOMAS BATES
Hier ist ein super Video zum Thema Produktfotografie.
Das Video ist von 2009, aber sehenswert.
Danke an „peterbelangerphoto“.
Das Bildformat die 2te.
Dank Instagram sind quadratische Aufnahmen aktuell wieder stark in Mode.
Für hochwertige Studio-Aufnahmen wurden besonders gerne Hasselblads im quadratischen 6:6-Format eingesetzt. Ich liebe diese Kamera! Gleichzeitig sind quadratische Aufnahmen statisch und ohne Dynamik, was hervorragend zur inszenierten Studio-Fotografie passt.
Platziert ihr euer Hauptmotiv rechts oder links im Bild, wirkt die Aufnahme eher querlastig, befindet sich das Motiv dagegen oben oder unten, dann wirkt die Aufnahme wie ein Hochformat.
Ein zentral platziertes Hauptmotiv erzeugt einen besonderen Reiz und führt zu einem sehr präsenten und starken Bildeindruck. In quadratischen Bildern lässt sich nur schwer ein Gefühl von Tiefe vermitteln. Deshalb ist es wichtig, bei der Bildgestaltung ein Motiv in den Vordergrund einzubauen.
Seminar für Landschaftsfotografie in Schweden.
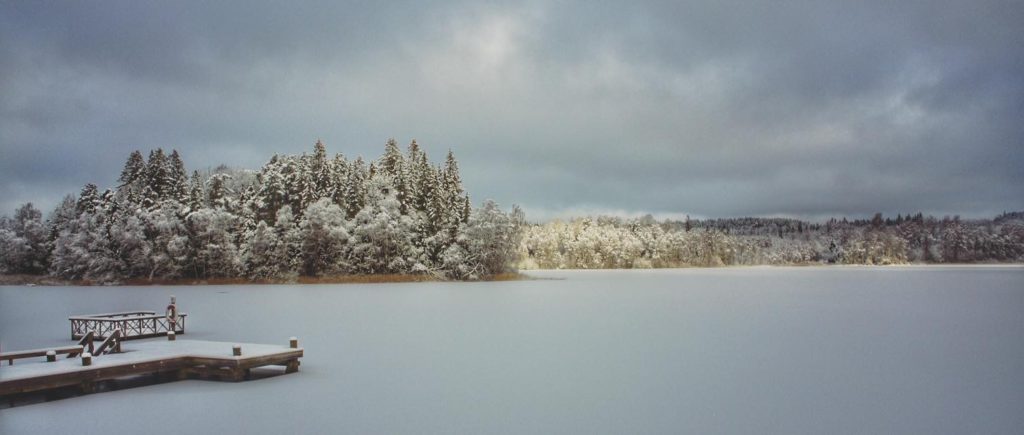
Letztes Wochenende fand unser Seminar über Landschaftsfotografie statt, dieses mal in Schweden. Wir hatten ein gutes Wetter, reichlich Schnee, ein spitzen Licht und jede Menge Spaß.
Wenn auch Du Interesse an einem individuellem Foto-Seminar hast, dann melde Dich bei uns.
info@m-foto.at
Polaroid Camera
Hier sind einige gute Tips von einem Freund und Fotografenkollegen! Wenn ihr Fragen zu Polaroid oder Instant Fotografie habt, ist er die beste Anlaufstelle.
Ihr findet ihn auf youtube unter : „Analog Things“
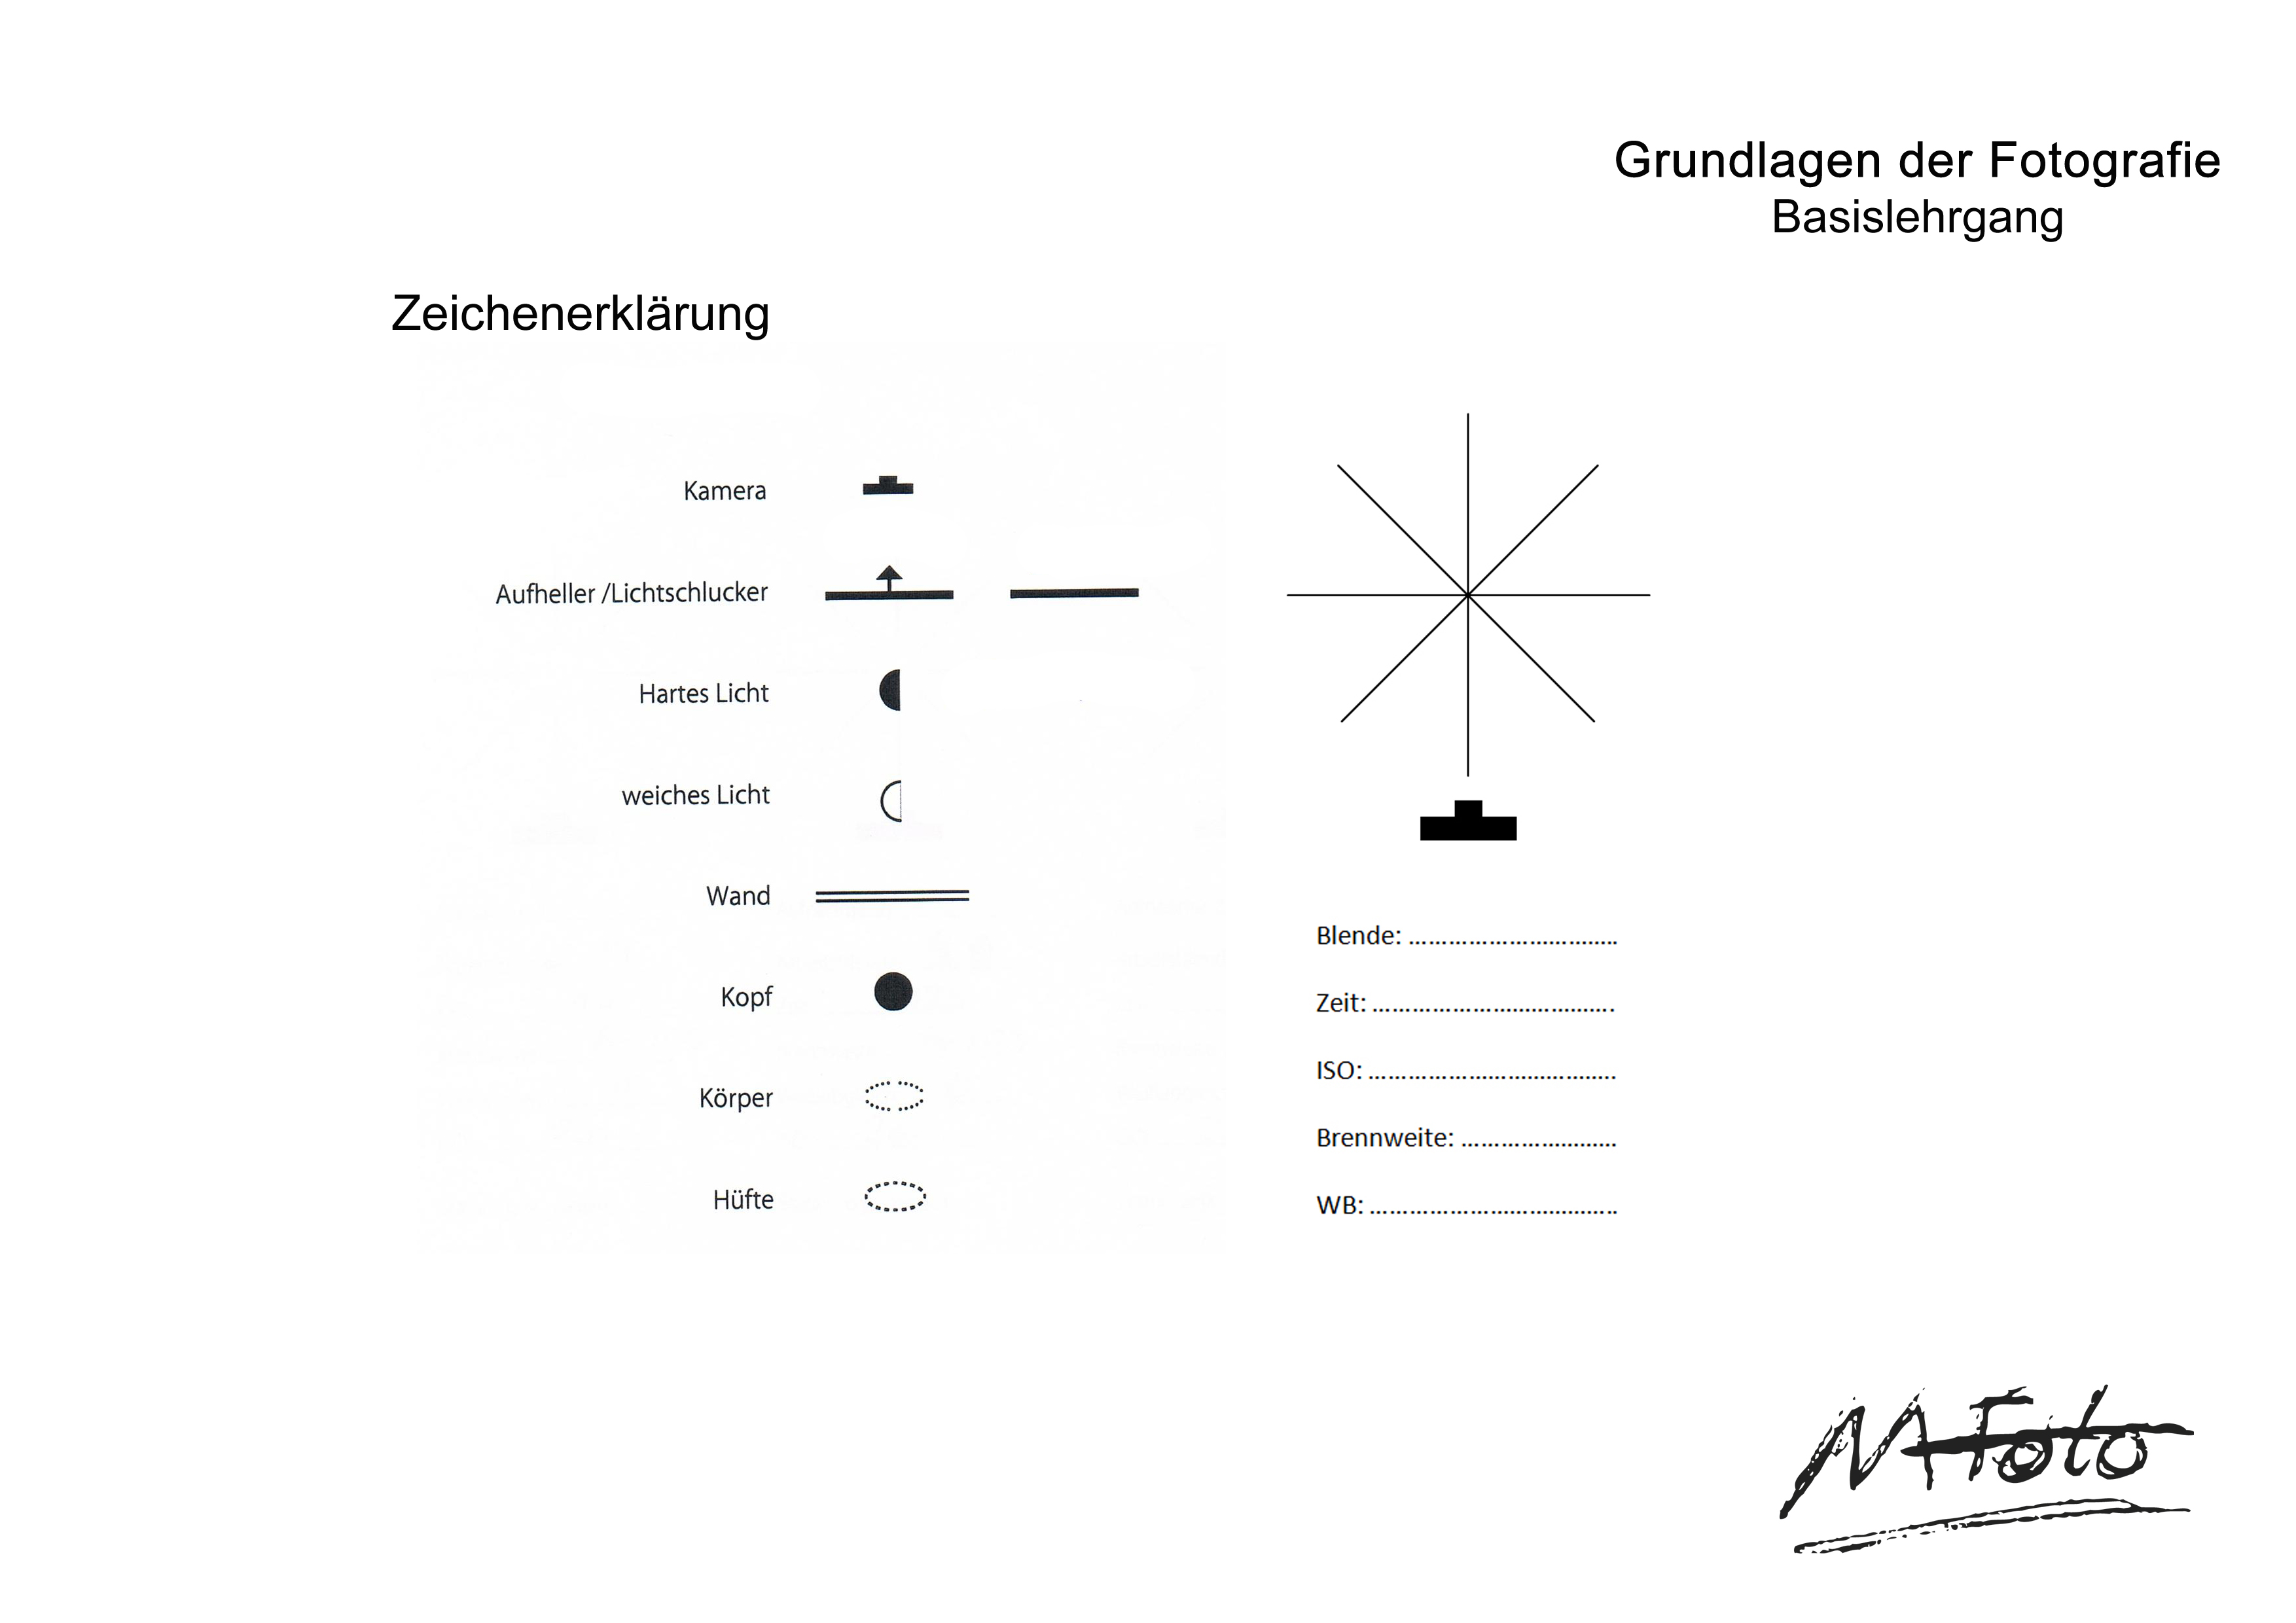
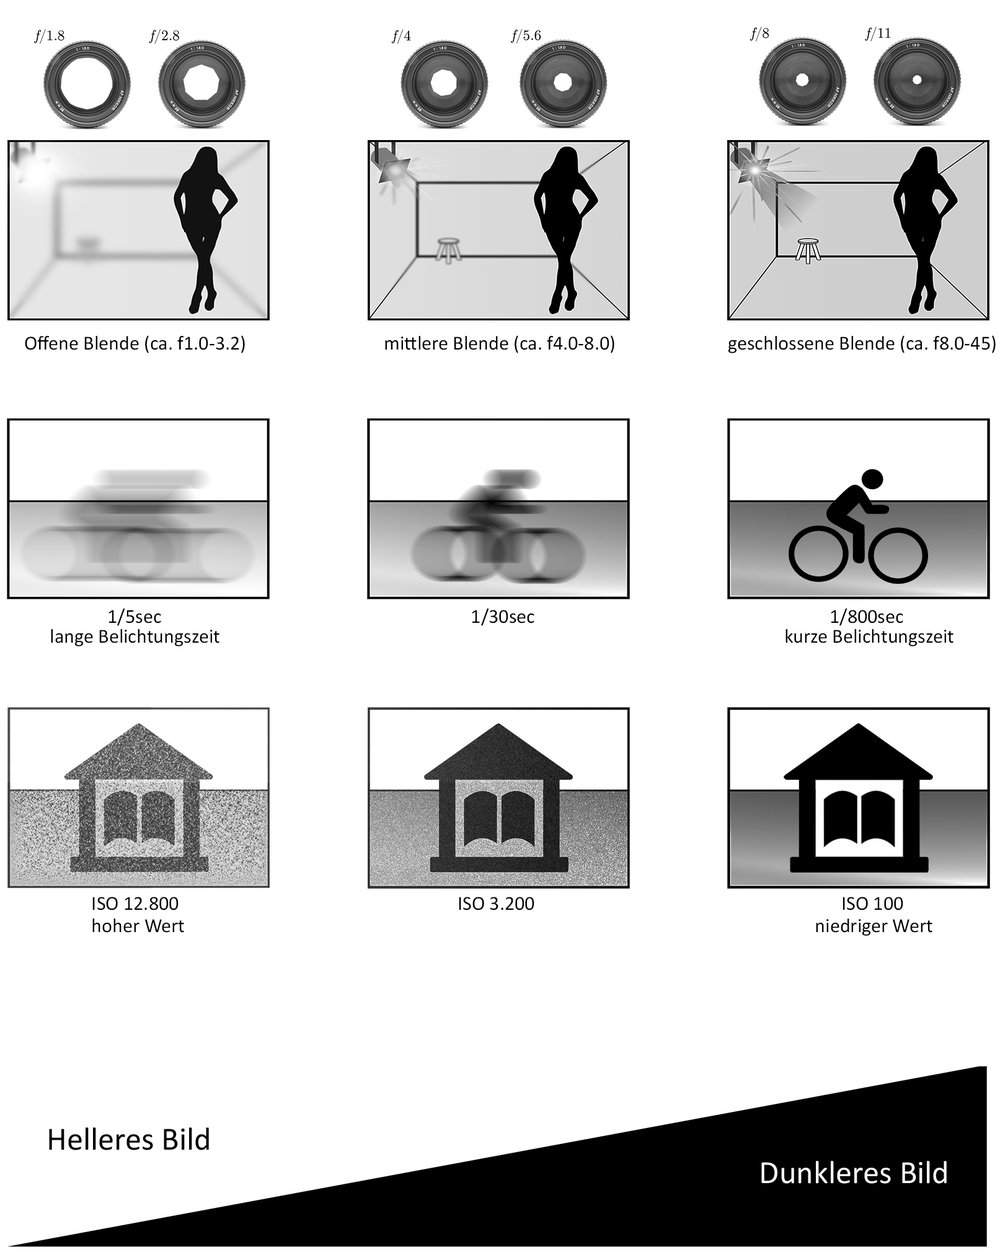
Die Grundlagen+ISO+Blende+Zeit
Eine kleine Hilfe für unterwegs.
Die Farbenlehre nach Johannes Itten.
Ich habe ein sehr interessantes Video zu Thema „Farbenlehre“ gefunden. Man sieht in diesem Video sehr gut, wie man mittels Farbe, die Raumtiefe in einem Bild bzw. einem Foto beeinflussen kann. Es ist auch sehr interessant veranschaulicht, wie die emotionale Wahrnehmung in einem Bild/Foto gesteuert werden kann.
Vielen Dank an „Der Kunsterklärer“.